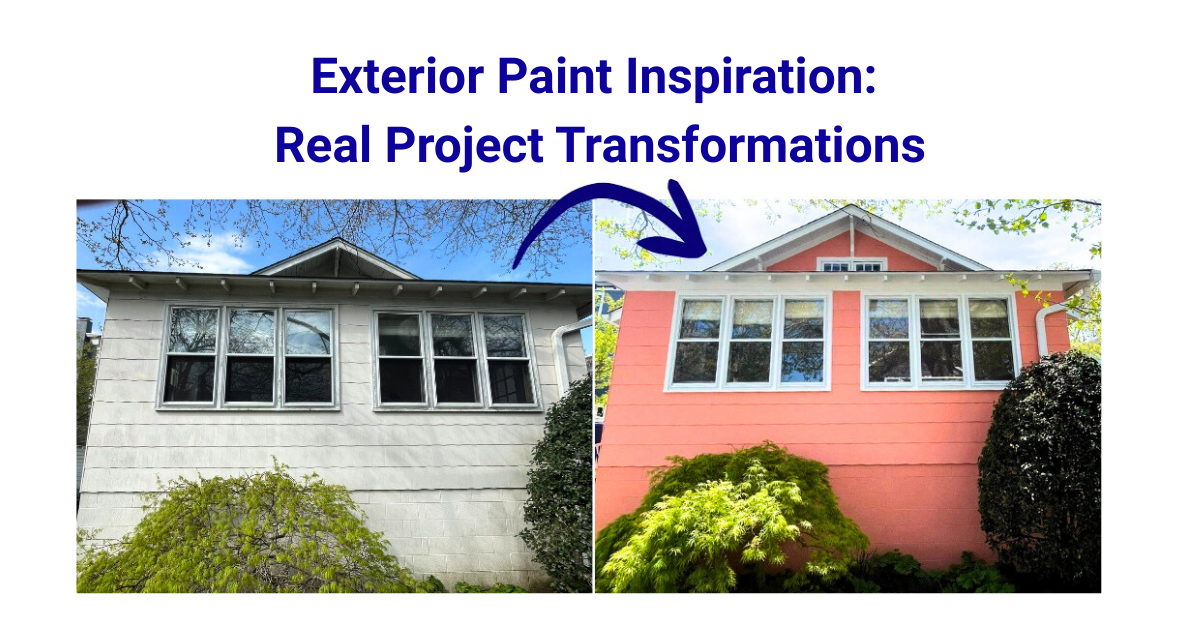
A fresh coat of paint can completely transform your home—boosting curb appeal, increasing property value, and creating spaces you actually want to spend time in. But here’s the problem: one bad painting decision can cost you thousands in do-overs, damage your walls, and leave you with results that look worse than when you started.
Whether you’re considering a DIY project or vetting professional painters in southeastern Pennsylvania or New Jersey, understanding these common painting mistakes could save you serious money and frustration. Let’s dive into the seven most costly errors homeowners make—and how to avoid them.
Mistake #1: Skipping Surface Preparation (The #1 Reason Paint Jobs Fail)
Ask any professional painter what separates great results from disasters, and they’ll tell you the same thing: preparation is everything. In fact, proper surface prep accounts for 80% of a quality paint job.
Yet this is the step most often rushed or skipped entirely by eager homeowners. Here’s why that’s a problem:
Paint won’t stick to dirty surfaces. Dust, grease, and residue prevent paint from bonding, leading to chipping and peeling within months. That beautiful new color you’re so excited about? It’ll be flaking off before the year is out if you don’t properly clean first.
Glossy surfaces need roughing up. Glossy surfaces need to be scuffed thoroughly to create grip, and damaged areas must be smoothed out to avoid visible imperfections. Painting over that old semi-gloss without sanding? You’re setting yourself up for failure.
Cracks and holes show through. Every imperfection you skip will be magnified once fresh paint highlights it. Those tiny nail holes? They’ll look like craters under your new paint.
What to do instead: Clean walls with mild soap and water, especially in kitchens (grease buildup) and bathrooms (moisture and product residue). Sand glossy surfaces to create tooth for new paint. Patch all holes, cracks, and imperfections with proper filler, then sand smooth. Yes, this takes time. But it’s the difference between a paint job that lasts 7-10 years and one that fails in 2.
Mistake #2: Choosing Paint Colors Without Testing
We’ve all done it—fallen in love with a color chip at the store, bought gallons of paint, and then watched in horror as it goes on the walls looking completely wrong. Maybe that “perfect gray” looks purple in your bedroom. Maybe the “soft beige” reads bright yellow next to your floors.
Lighting, room size, and surrounding furniture can all change how a color looks on the wall. That tiny 2×2 inch chip under fluorescent store lighting bears almost no resemblance to how the color will look on your walls at home.
The lighting factor is huge. North-facing rooms get cool, blue-toned light that makes colors look darker and cooler. South-facing rooms get warm, golden light that makes colors brighter and warmer. The same paint will look completely different in these two spaces.
Existing elements change everything. Your honey oak floors have warm orange undertones. Your granite countertops have cool gray veining. These fixed elements interact with your wall color in ways you can’t predict from a tiny chip.
What to do instead: Test paint samples directly on your wall and check the color at different times of day, in natural and artificial light. Paint large swatches (at least 2×2 feet) on multiple walls in the room. Live with them for several days. Look at them in morning light, afternoon light, evening light, and under your artificial lighting at night.
Mistake #3: Skipping Primer (Or Using the Wrong Kind)
Primer is often misunderstood—and frequently skipped by DIYers who assume a good paint will cover everything. But primer does specific jobs that paint alone can’t handle.
Primer improves adhesion. Especially on raw wood, previously unpainted drywall, or glossy surfaces, without primer, paint may not stick or may peel prematurely.
Primer blocks stains. Water marks from that old roof leak? Grease stains in the kitchen? Water marks, grease spots, or wood tannins can bleed through paint unless properly sealed with a stain-blocking primer. Skip primer, and those stains will haunt you forever.
Primer ensures true color. Ever painted a light color over dark walls and needed four coats to get coverage? Tinted primer solves this problem, giving you true color in fewer coats.
What about “paint and primer in one”? These products work fine for straightforward projects—repainting similar colors on already-primed surfaces. But they’re not real primer. If you’re covering dark colors, dealing with stains, painting raw wood or new drywall, or going over glossy surfaces, you need dedicated primer. Period.
What to do instead: Use the right primer for your situation. Stain-blocking primer for water stains or wood tannins. Tinted primer when going from dark to light. Bonding primer for glossy surfaces. Yes, it’s an extra step. But it’s the difference between a paint job that looks great and one that looks mediocre.
Mistake #4: Using Cheap Tools (Or Wrong Tools for the Job)
If you decide to go cheap with your brushes and rollers, it will show up in the paintwork. Here’s what happens with low-quality tools:
Cheap brushes leave visible marks. They shed bristles into your wet paint. They don’t hold enough paint, forcing you to reload constantly. They create streaky, uneven coverage. That gorgeous Benjamin Moore paint you splurged on? Wasted if you’re applying it with a $3 brush.
Cheap rollers are worse. They don’t hold paint properly, leading to uneven application. They leave texture and “stippling” on your walls. They shed lint and fibers that get trapped in your finish. And they fall apart halfway through the project, forcing you to stop and buy new ones anyway.
Wrong nap thickness ruins finishes. Smooth walls need short nap (1/4″ or 3/8″). Textured walls need longer nap (1/2″ or 3/4″). Use the wrong one and you’ll either get poor coverage or add unwanted texture.
What to do instead: Quality brushes provide smooth coverage and will last for a while if you take care of them. Buy quality roller covers appropriate for your surface texture. Get proper painter’s tape that actually seals edges. Your results will be dramatically better, and good tools last for multiple projects.
Mistake #5: Wrong Paint for the Wrong Space
Many homeowners select paint based on color alone, overlooking the importance of choosing the right type and finish for the specific space. This creates real problems:
Using interior paint outside. Interior paints aren’t formulated to withstand moisture, UV exposure, or temperature shifts and will almost always result in peeling or fading. You’ll be repainting within a year—guaranteed.
Wrong sheen for the space. Flat paint in a bathroom? It’ll absorb moisture and grow mold. Flat paint in a hallway? Every handprint and scuff will show permanently. High-gloss paint on imperfect walls? Every bump and dent gets highlighted.
Not using moisture-resistant paint in wet areas. Bathrooms and kitchens need paint formulated to resist moisture, humidity, and occasional water contact. Regular paint will bubble, peel, and grow mildew.
What to do instead: Match paint type and sheen to the space:
- Bathrooms and kitchens: Semi-gloss or satin finish with moisture resistance
- Living rooms and bedrooms: Eggshell or satin for easy cleaning
- High-traffic hallways: Eggshell or satin (washable finishes)
- Ceilings: Flat finish (hides imperfections)
- Trim and doors: Semi-gloss (durability and easy cleaning)
- Exterior: Only use paint specifically formulated for exterior use
Mistake #6: Painting in Bad Weather or Poor Conditions
Temperature and humidity dramatically affect how paint performs, yet homeowners constantly ignore these factors.
Too cold: Paint won’t cure properly below 50°F. It’ll take forever to dry, stay tacky, and may never fully harden. That weekend project in March? You might be in trouble.
Too hot: Above 90°F, paint dries too fast, preventing proper leveling and adhesion. You’ll see lap marks, brush strokes, and uneven finish.
Too humid: High humidity slows drying dramatically and can cause paint to run, sag, or not adhere properly. It can also trap moisture under the paint, leading to bubbling and peeling later.
Poor ventilation: When you paint indoors, fumes from the paint can build up quickly, leading to headaches, dizziness, or respiratory issues. Beyond health concerns, poor airflow means longer drying times and increased risk of dust settling into wet paint.
What to do instead: Check weather forecasts for exterior projects. Ideal painting conditions are 50-85°F with low humidity. For interior projects, open windows and use fans to circulate air (but not directly on wet paint). If you’re painting multiple rooms, paint one at a time so you can maintain good ventilation. Don’t rush projects just because you have a free weekend—wait for proper conditions.
Mistake #7: Underestimating the Project (Time, Skill, and Complexity)
Painting seems quick until you’re three hours in and barely done with prep. This is perhaps the most expensive mistake because it compounds all the others.
Time: Professional painters can paint a room in a day. Why? Because they do it every day. For you, that same room might take an entire weekend—or longer if you’re working around a full-time job and family obligations.
Physical demands: Painting is genuinely exhausting. You’re climbing ladders, reaching overhead, bending, kneeling, and working in awkward positions for hours. Most people underestimate how physically demanding it is until they’re three hours in with aching arms and a sore back.
Skill requirements: Cutting clean lines between walls and trim, achieving smooth coverage without visible brush marks, handling tricky areas like vaulted ceilings or stairwells—these require real skill developed over years of practice.
Hidden complications: Once you start, you discover the water damage that needs fixing, the trim that should be replaced, the mold that needs remediation. What started as a “simple paint job” becomes a major renovation.
What to do instead: Be honest about your capabilities, available time, and the project scope. For small, straightforward projects—a single bedroom or office—DIY can work if you’re willing to invest the time and effort to do it right. For larger projects, challenging spaces (exteriors, stairwells, high ceilings), or when you need it done quickly and correctly, professionals are worth every penny. They bring expertise, efficiency, proper equipment, and insurance if something goes wrong.
The Real Cost of Painting Mistakes
Let’s talk money. A professional interior painting project for an average room might cost $500-1,200. Seems like a lot, right? Until you consider what mistakes cost:
- Premature failure from poor prep: Repainting in 2-3 years instead of 7-10 years = paying twice
- Wrong color choice: $200-400 in wasted paint plus another $200-400 for the right color
- Damaged surfaces from improper technique: Drywall repair costs $200-500 before you can even repaint
- Injury from ladder falls: Medical bills, lost work time, potential disability
- Your time: If your time is worth $50/hour and a DIY project takes 40 hours vs. a pro’s 8 hours, that’s $1,600 in opportunity cost
Suddenly, professional painting doesn’t look so expensive.
When to DIY vs. When to Call Professionals
DIY might work for:
- Single, small rooms with standard 8-foot ceilings
- Simple, straightforward projects (no repairs needed)
- When you have plenty of time and aren’t rushed
- Touch-ups and small repairs
- If you genuinely enjoy the process and don’t mind imperfect results
Call professionals for:
- Entire homes or multiple rooms
- Exterior painting (safety, proper equipment, surface prep expertise)
- High ceilings, stairwells, or hard-to-reach areas
- When you need it done quickly and correctly
- Cabinet painting (extremely technique-sensitive)
- When surface repairs are needed
- Any project where mistakes would be costly
Ready to Avoid These Mistakes?
Painting your home is a significant investment in your property and your daily living environment. Whether you choose to DIY or hire professionals, understanding these common mistakes helps you make informed decisions and achieve results you’ll love for years to come.
If you’re in southeastern Pennsylvania or New Jersey and want to ensure your painting project is done right the first time, we’re here to help. Our team has seen every one of these mistakes countless times—and we know exactly how to avoid them. From thorough surface preparation to proper paint selection and expert application, we handle every detail so you don’t have to worry about costly do-overs.
Contact us today for a free consultation!
We’ll assess your project, discuss your goals, and provide a detailed estimate with no surprises. Your home deserves a paint job that looks beautiful and lasts—let’s make that happen together.